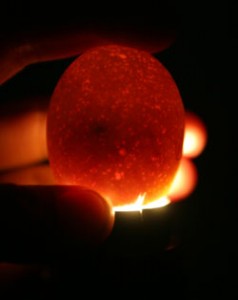
Candling Eggs is an easy process that gives you assurance that your eggs are fertile and developing correctly after a short period of time in the incubator. It allows you to remove infertile eggs and soon you will start to be able to identify ‘bad eggs’ and remove these as well. The candling photos on this page should help you to identify these.
Although it has never happened to me, bad eggs can sometimes explode or ooze in the incubator causing bacteria to contaminate the other good eggs, causing them, in turn to go bad.
I usually candle my eggs after a week of incubation. It can of course be done before this but the first week of incubation is the most critical in terms of getting the correct development of the embryo so leaving the eggs alone during this time is good practice. After a week, we are a third of the way through incubation and it is far easier to identify fertile eggs, even if eggs have a dark shell as is the case with Marans.
How to candle eggs
You will need a bright light and a way of shining this through the egg. Candlers can be bought online from poultry shops, or you can make one using a bright light and a cardboard box with a hole cut out for the egg to sit on. Try to get the best seal around the hole and candle in a dark room to see the best results.
Candling Dark Eggs
If the shells are dark or have pigments / marks on them, it can be difficult seeing the embryo. I rock the egg from side to side very gently so the contents move. This must be gentle, or you risk damaging the Chalazae that hold the yolk / developing embryo.
“The Chalazae is the structure that suspends the yolk within the egg. It can be damaged by shocks and vibration”
Remember not to candle for too long if it is heating the egg. I spend around 8 seconds per egg before trying the next one.
What to look for after a week
After 7 days, you should be able to see development of the embryo, including spider like veins and even (if you are lucky) a little movement. The embryo often sits on one side of the egg so be sure to rotate the egg around slowly to get the best view. Occasionally, you may see a tiny heart beating if it is close to the edge of the shell.
Look for fertile and non fertile eggs. Clears as they are called are easy to remove after 7 days. If you have a number of eggs in the incubator, it soon becomes clear which eggs have developed correctly.
By day 7, you should clearly see the embryo. Don’t forget to turn the lights out in the room when you do this so you get a clearer picture!
What to look for after two weeks
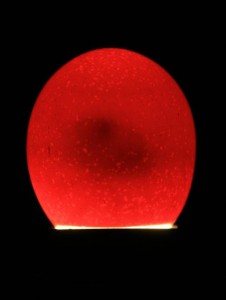
After 14 days, the embryo is well developed and turning into a chick. Two thirds of the egg is now covered and it is hard to see any detail.
Look for embryos that have developed so far but died. This can be for a number of reasons, including incubation technique, damage to the chalazae (which can happen when eggs are dropped / damaged in the postal system for example) or become infected with bacteria. A red ring is sometimes seen inside the egg which is the bacterial infection.
The photo to the right shows how much of the egg is now filled with the embryo / soon to be chick. It is more common to see movement inside the shell.
Bad Eggs
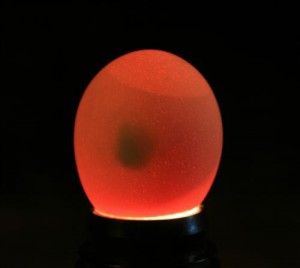
If an egg appears bad, it can be removed to prevent it from exploding and contaminating other eggs. Bad eggs can look different every time but if you compare them to the bulk of the other good eggs in the incubator, it won’t be long before you can recognise a bad egg from the rest. The bad egg shown to the right was found at day 14, two weeks into incubation. Clearly comparing this to our last photo, there is a problem.
Bad eggs don’t change – so if you are unsure, mark it and have another look a few days later to see if it still looks the same.
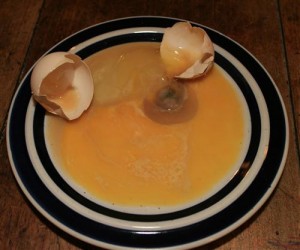
The second photo shows to the right shows the contents of this bad egg after it was opened on a plate. I wouldn’t normally do this because it can be smelly but was worth while to show what the contents looked like, clearly not a nearly developed chick!
There are a few more photos on poultrykeeper’s candling chicken eggs page here.





Can I distinguish fertile, unfertile and putrefied eggs before incubating?
Unfortunately not without cracking the egg open.