Hatching eggs can be a very rewarding experience and many beginners are buying incubators since they have become far more affordable over the last few years. The main manufacturers for the small scale hobby market are R-COM and Brinsea Incubators. Both produce an excellent range that can accommodate 20 to 25 chicken eggs, perfect for the beginner to hatch their own eggs!
Before you start
Before you incubate and hatch chicks, you should remember that you will end up with a ratio of half male and half female chicks. Unless you are hatching an autosexing breed (where markings or colour of the chicks are different colours) or have crossed two birds that give a sex-linked chick (again, different down colour or markings) then you will need to think ahead to when the young growers can be sexed around 8 weeks of age and consider what you will do with the excess of male birds. Sadly, they are very hard to re-home, everyone has the same problem: too many boys.
Choice of incubator

The R-Com Suro is a forced air incubator that controls both temperature and humidity.
There are essentially two types of incubator –still air and forced air. The big difference between the two is the forced air uses a fan which circulates the air inside. When you measure the temperature, it should be the same throughout. The still air incubator has a temperature gradient inside so the hotter air rises to the top and there can be several degrees difference between top and bottom. For the average beginner wanting to increase the size of their flock, a forced air incubator is in my opinion the best choice. If you can afford a model that has automatic humidity control then you should have far more success than setting and maintaining the humidity control on a manual unit.
Incubating Chickens Eggs
Chickens eggs have a 21 day incubation period (isn’t that amazing? Egg to chick in just 3 weeks!) and require a constant temperature of 37.5°C. Eggs will start to produce their own heat in the latter stages of development but the incubator thermostat takes care of this, keeping the temperature the same throughout the incubation period. Humidity should ideally be between 45 and 50%. Eggs need turning regularly by 180 degrees and you will need to do this yourself if the incubator doesn’t have an automatic turning mechanism. Expect 50% to 75% of your eggs to hatch, not all eggs will be fertile.
Hatching Eggs
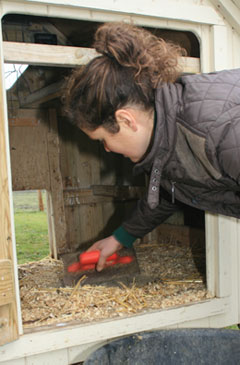
Eggs need to be fertile so a cockerel needs to be running with the hens for a few weeks before eggs are taken for hatching. If you have a cockerel, you can collect your own hatching eggs from your chickens. Try to pick good looking ‘egg shaped’ eggs, this will help the chicks form and hatch correctly as mother nature intended. Keep nest boxes clean and don’t set any soiled eggs. If you don’t have a cockerel or would like a different breed, there are many hatching eggs for sale online on sites such as eBay but keep in mind that just about anyone and everyone sells eggs so birds vary in quality between sellers. Hatching eggs travelling through the postal system can be damaged internally and either not develop or die before they hatch. These are often called dead in shell.
Incubation tips:
- Before you put your eggs into any incubator, make sure it has been sterilised with an incubation disinfectant (or as a minimum warm soap and water if you don’t have this). This will kill bacteria that multiply rapidly in the warm temperature of the incubator.
- Plug in your incubator and make sure the temperature is steady at 37.5°C. Always leave it to run overnight to settle before putting eggs in.
- Keep water reservoirs topped up so that adequate humidity can be maintained at all times.
- Candle eggs before putting them into the incubator. Cracked or damaged eggs do not hatch and should be removed after candling (see below for more information on candling).
Candling Eggs

Candling an egg in the dark using a special candling torch. Blood vessels and the embryo can be clearly seen after a week.
Fertility of eggs cannot be determined before incubating them. It is easiest to see development of the embryo after a week. The most critical period of incubation is the first week so if you do decide to candle your eggs before a week then be very careful with them and do not overheat them. Eggs with blood rings, cloudy eggs or clear eggs (infertile) should be removed when detected. The photo to the right shows an egg that was candled after 8 days. If you can’t see much, do this in the dark. It may also help to tip the egg gently from side to side so you can see the inside of the egg moving and see what are patches on the egg shell and what is inside. The developing spider like veins and a small dark embryo can be seen. If you look carefully and have a bit of luck with the positioning of the embryo, you can often see a small heart beating away. I usually candle after 7 days and again at around 14 days. There is more information on a separate page about candling eggs.
The Air Sack
An Air Sack is formed at the broad end of the egg shortly after an egg is laid. There is a membrane between this and where the chick is developing. When candling periodically through the incubation period, this is the best method of judging normal development and you will see this increase in size up until the point that the chick breaks through into this air sack.
The Hatch
- A chick will usually ‘pip’ the shell a few hours after breaking into the air sack so she can breathe but a full hatch can take 12 or more hours from this point so be patient.
- If humidity has been set too high during the incubation period, the chick may pip the shell underneath the shell and drown in the fluids before he can get his beak out of the shell.
- If the humidity has been too low, the air sack will be too large and the chick will be under-developed and may become stuck to the shell, too weak to break free.
If a chick has pipped but does not make any progress, wait 12 hours, then consider breaking the top part of the shell away (but no more…) Some say do not help weak chicks as you are breeding weakness into your flock but there are many reasons why eggs don’t hatch. If it is a humidity problem like this or the line is particularly in-bred (often found with exhibition strains) then a little help can usually be given without detrimental effect.
The film above is speeded up and shows the final moments of a Copper Black Marans egg hatching in an RCOM King Suro incubator. As you can see with the King Suro, there is a good viewing window to see what is going on! It is my favourite incubator and is incredibly well priced.
And finally…
- Do not remove hatched chicks until they are fully dried out. Chicks do not need to eat for 24 hours. This is why they can be shipped around commercially as ‘day old chicks’.
Good luck with your hatch!
Do you have any tips on hatching eggs? Please leave me a comment below.
Hi we’ve just bought some hatching eggs to arrive tomorrow but I am unsure of how to handle them when they arrive. Can they be put straight under my broody hens or do I need to prepare them in some way as ive seen some people say they need to be pointy end down for a while? Thanks
It’s best to remove the eggs from their packing, place them into an egg box, pointed end down and leave them for 12-24 hours to settle. Make sure the incubator is running during this time so that it can stabilise, then add the eggs once the temperature and humidity is correct.
Eggs are pretty robust but if they are dropped or knocked hard in the post, it can damage the blastoderm inside which can prevent the chick from developing and hatching correctly. It can be ‘fingers crossed’ at times…
Good luck!
That’s great thanks but my eggs are going with my hens. So do they just go under them after they’ve settled for the time stated. Also wont this make them less likely to be fertile leaving them out for so long as they will possibly be 5-6 days old by the time they get under the hens.
Eggs lose fertility slowly with age – but up to a week there is very little loss in fertility. Once you get to 10 days or so, then you are likely to see a larger percentage of infertiles.
Where would I be able to buy hatching eggs from
It depends where you are in the world… In the UK there are poultry auctions and eBay as well as breeders advertising on their websites.
i have had 12 chicks hatch with deformed legs what could be cause of this please
I don’t really know but I’ve heard about genetic problems, incubation problems and lack of certain vitamins in the feed.
I would make sure the adult stock are healthy, have a good quality feed and check the temperature and humidity of the incubator.
Morning, trust you good.
Just a question here, at what temperature and humidity will i set the machine to until they are hatched.
I’m somehow confuse because i see temperature at 37.5 Deg cel and humidity 45-50%, hence some recomand temperature to be above 95.9% and humidity 45-50%. and the last three days humidity to be at 95%.
advise which one to consider?
Hello,
It should be 37.5 deg C and 45-50% until the last few days when humidity is increased to 60+% to help soften the shells. It’s very hard to get higher than about 75% humidity in most cases.
99.5 deg F is often quoted in the US. It’s the same temperature in different units.
Good luck!
What if the temperature is set to 40degrees celsius for the first 8 hours inside the incubator? What are the posible effects on the eggs?ty
40 degrees is likely to kill the embryos, but maybe the temperature inside the eggs didn’t get that high over the first 8 hours. They need time to heat up.
You should be able to tell after candling the eggs after a week.
How often do I turn the eggs 180°?
If you are turning eggs by hand Cindy, they should be turned at least 3 times per day. Always have an odd number so they aren’t left on the same side overnight.
Good luck!